
How to configure controller on RetroPie
If you need guidance, this tutorial will help you out to configure controllers on RetroPie.
How to configure controller on RetroPie
In order to use RetroPie as a gaming platform, you will need to configure your controller that will help you in playing different games with ease and you will need to look at the following steps in order to do it at perfection.
Step 1: The choice of using a controller for every game is different and the Raspberry Pi has an excellent advantage that it supports multiple controllers and you won’t experience any compatibility issues. However, if you want to purchase a good gaming controller, then you should first need to purchase a good controller for your device on the Amazon website through the following link.
Step 2: After successfully installing the RetroPie emulator on your SD card, you will need to insert the SD card into your device by first turning on the Raspberry Pi device.
On the first boot screen, you will see a Welcome message and a confirmation that your controller is connected with your Raspberry Pi device.
Step 3: Now, you will need to follow the onscreen instruction that is to hold a button of your controller until you see your controller name right below the “Press F4 ” text line.
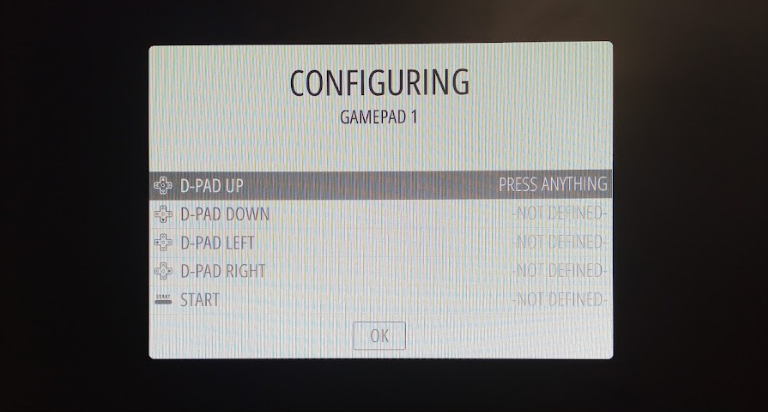
Step 4: In the next window screen, you will need to press each key one by one and you will need to be careful in doing that operation as this will be crucial on how you control your RetroPie with the controller.

Follow the gamepad option and choose to press the key which is ideal for the selected option. Once you have properly configured all the controller keys, you are now good to follow the next step by choosing the “OK” option from the “A” button to accept the changes.
There it is now you are ready to install and play your favorite classical video games with the help of a game controller.
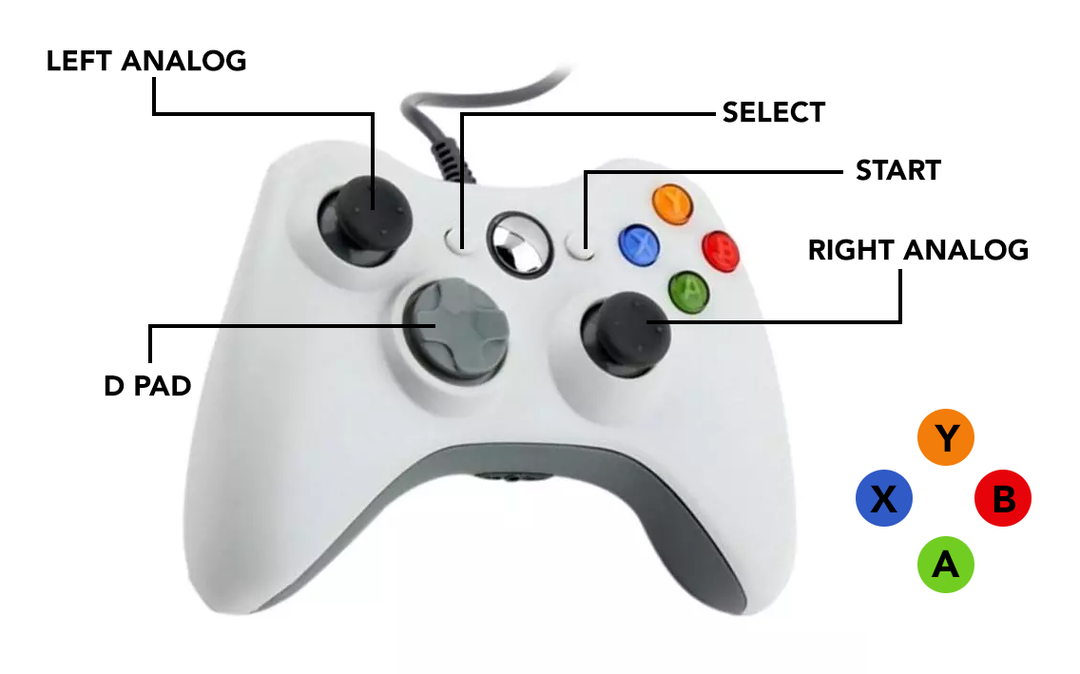
Below is the key layout of the Xbox360 controller which is connected with our Raspberry Pi device. In case you have other controllers, you can visit the official RetroPie website to check for their keys.
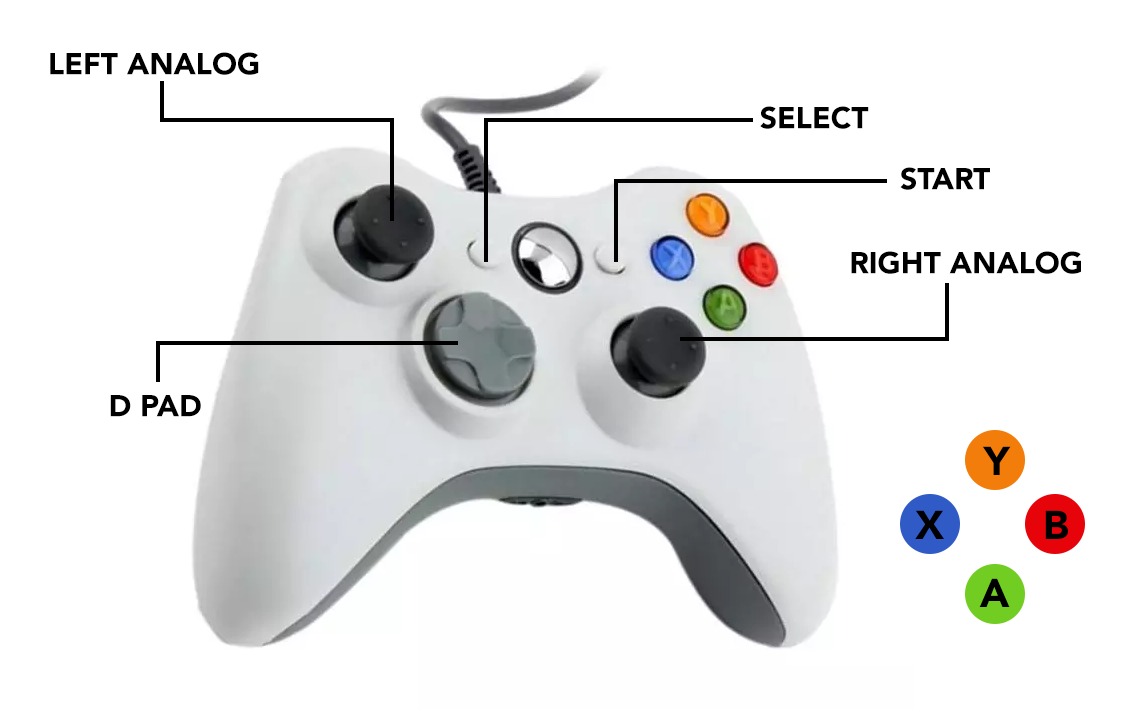
How to manually configure your controller on RetroPie
If you haven’t configured your controller properly at the initial boot option or you have bought a new controller and now you want to configure it so that it will help you to play games on RetroPie easily then you can do that while going into the RetroPie configuration option.
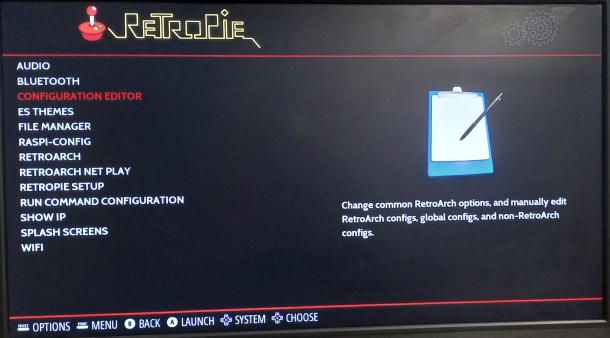
You will find RetroPie configuration in the main menu and once you locate it you will then need to perform the following steps to configure your game controller.

Step 1: On the RetroPie screen, press the select button from your controller to enter into the RetroPie menu.

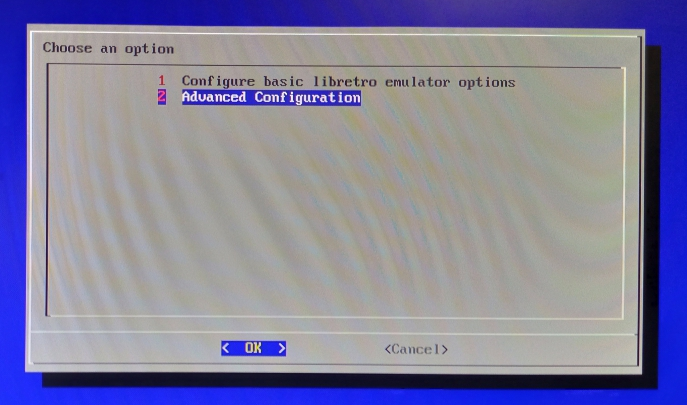
Step 2: On the first screen, you will need to go on the “Advanced Configuration” option by pressing the “Enter” button.
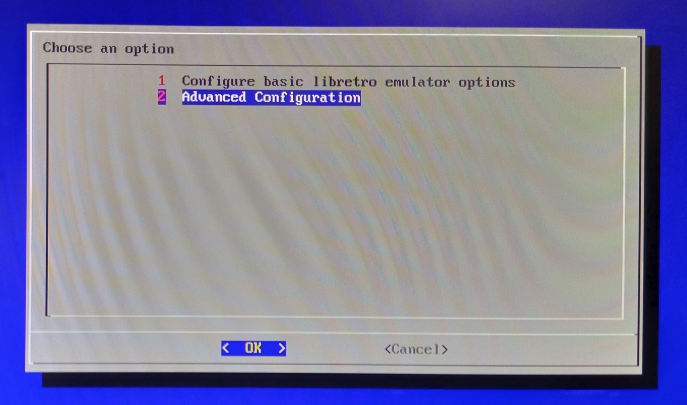
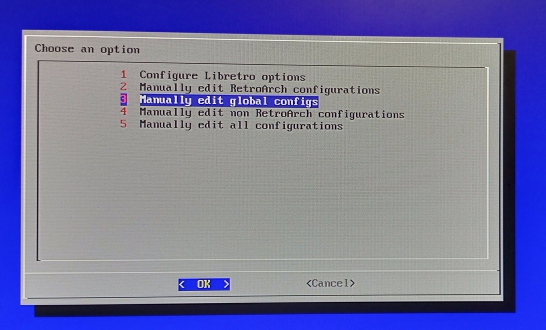
Step 3: In the next step, you will need to select the option “Manually edit global configs”.

Step 4: Now after doing the above step, you will be able to see your connected gamepad configuration which is shown in the image below. In our case, it is an XBox 360 controller and that’s why we will have to select it as our controller option.
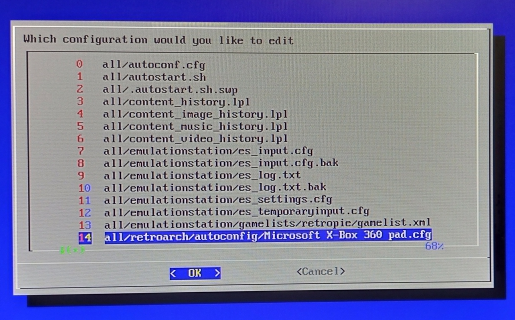
Step 5: As soon as it is selected, you will see the configuration of XBox 360 will open on the screen and this is the stage where you will need to configure the controller setting according to your choice.
You will need to ensure that you must have a proper understanding of the gamepad and for guidance, you can refer to the RetroPie website for help.

You can also change the configuration setting of your controller according to your game by going into the first step and choosing the first option and then setting your controller according to your game. Once the controller configuration is completed, you are good to go and start playing your games on RetroPie.
Conclusion
The Controller plays a critical role in letting your game experience go beyond your imagination and once you have installed RetroPie on your Raspberry Pi device it would be necessary to configure the controller properly. The above guide will be beneficial in configuring the controller on your Raspberry Pi device so that you will be able to play different games on RetroPie emulator and enjoy the worthy experience offered by the emulator for the games lovers.
About the author

Awais Khan
I’m an Engineer and an academic researcher by profession. My interest for Raspberry Pi, embedded systems and blogging has brought me here to share my knowledge with others.
click fraud protection
Если вам нужно руководство, это руководство поможет вам настроить контроллеры в RetroPie.
Как настроить контроллер на RetroPie
Чтобы использовать RetroPie в качестве игровой платформы, вам нужно будет настроить контроллер, который поможет вам в с легкостью играть в разные игры, и вам нужно будет просмотреть следующие шаги, чтобы сделать это на совершенство.
Шаг 1: Выбор использования контроллера для каждой игры отличается, и у Raspberry Pi есть отличное преимущество, заключающееся в том, что он поддерживает несколько контроллеров, и у вас не возникнет проблем с совместимостью. Однако, если вы хотите приобрести хороший игровой контроллер, вам сначала необходимо приобрести хороший контроллер для вашего устройства на веб-сайте Amazon по следующей ссылке.
Шаг 2: После успешной установки эмулятора RetroPie на SD-карту вам нужно будет вставить SD-карту в ваше устройство, предварительно включив устройство Raspberry Pi.
На первом экране загрузки вы увидите приветственное сообщение и подтверждение того, что ваш контроллер подключен к вашему устройству Raspberry Pi.

Шаг 3: Теперь вам нужно будет следовать инструкциям на экране, которые заключаются в том, чтобы удерживать кнопку вашего контроллера, пока вы не увидите имя вашего контроллера прямо под текстовой строкой «Нажмите F4».
Шаг 4: В следующем окне вам нужно будет нажимать каждую клавишу одну за другой, и вам нужно будет будьте осторожны при выполнении этой операции, так как это будет иметь решающее значение для того, как вы будете управлять своим RetroPie с помощью контроллер.
Следуйте за опцией геймпада и выберите нажатие клавиши, которая идеально подходит для выбранного варианта. После того, как вы правильно настроили все клавиши контроллера, теперь вы можете перейти к следующему шагу, выбрав опцию «ОК» с помощью кнопки «А», чтобы принять изменения.
Теперь вы готовы установить и играть в свои любимые классические видеоигры с помощью игрового контроллера.
Ниже приведена раскладка клавиш контроллера Xbox360, который подключен к нашему устройству Raspberry Pi. Если у вас есть другие контроллеры, вы можете посетить официальный сайт RetroPie чтобы проверить свои ключи.
Как вручную настроить контроллер на RetroPie
Если вы неправильно настроили контроллер при начальной загрузке или купили новый контроллер и теперь хотите настройте его так, чтобы он помог вам легко играть в игры на RetroPie, тогда вы можете сделать это, зайдя в конфигурацию RetroPie. вариант.
Вы найдете конфигурацию RetroPie в главном меню, и как только вы ее найдете, вам нужно будет выполнить следующие шаги для настройки игрового контроллера.

Шаг 1: На экране RetroPie нажмите кнопку выбора на контроллере, чтобы войти в меню RetroPie.
Шаг 2: На первом экране вам нужно будет перейти к опции «Расширенная конфигурация», нажав кнопку «Ввод».
Шаг 3: На следующем шаге вам нужно будет выбрать опцию «Редактировать глобальные конфиги вручную».
Шаг 4: Теперь, после выполнения вышеуказанного шага, вы сможете увидеть конфигурацию подключенного геймпада, как показано на изображении ниже. В нашем случае это контроллер XBox 360, поэтому нам нужно будет выбрать его в качестве опции контроллера.
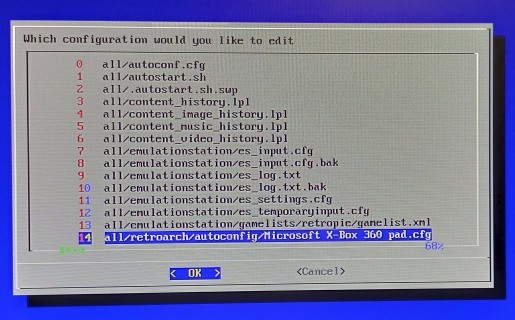
Шаг 5: Как только он будет выбран, вы увидите, что на экране откроется конфигурация XBox 360, и на этом этапе вам нужно будет настроить параметры контроллера в соответствии с вашим выбором.
Вам нужно будет убедиться, что вы должны правильно понимать геймпад, и для получения рекомендаций вы можете обратиться к Веб-сайт RetroPie для помощи.
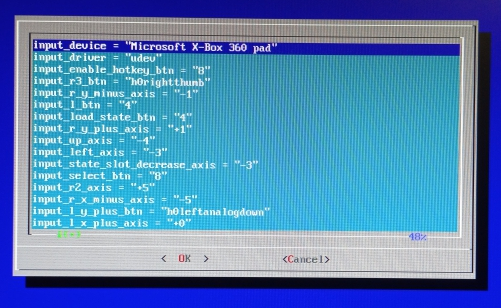
Вы также можете изменить настройки контроллера в соответствии с вашей игрой, выбрав на первый шаг и выбрав первый вариант, а затем настроив контроллер в соответствии с вашими игра. Как только конфигурация контроллера будет завершена, вы можете начать играть в свои игры на RetroPie.
Вывод
Контроллер играет решающую роль в том, чтобы позволить вашему игровому опыту выйти за рамки вашего воображения, и как только вы установили RetroPie на ваше устройство Raspberry Pi, необходимо настроить контроллер должным образом. Приведенное выше руководство будет полезно при настройке контроллера на вашем устройстве Raspberry Pi, чтобы вы могли играть в разные игры на эмуляторе RetroPie и наслаждаться достойным опытом, предлагаемым эмулятором для игр любовники.
Гайд по RetroPie
RetroPie — это программный комплекс, предназначенный для запуска ретро-игр на компьютерах Raspberry Pi. В основе системы лежит образ Raspberry Pi OS , EmulationStation и RetroArch.
Список поддерживаемых плат
Подключение и настройка
Запись образа
Настройка эмулятора
На экране монитора должна отобразится оболочка RetroPie.
Далее RetroPie предложит настроить джойстик или запустить настройку эмулятора. Нажмите клавишу F4 на клавиатуре для входа в меню настроек.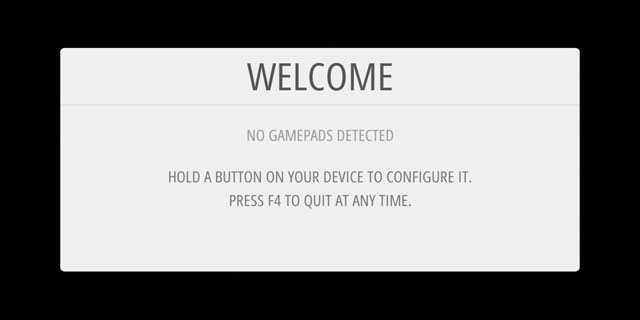
Откроется консольный режим RetroPie или другими словами командная строка.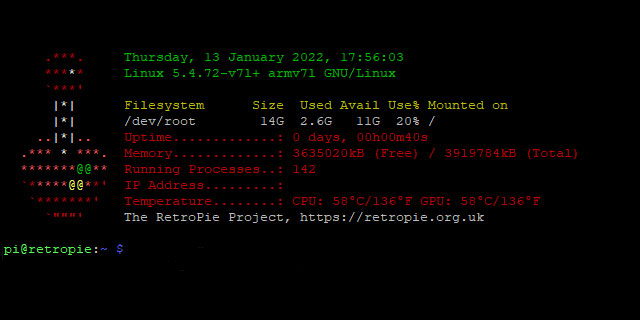
Настройка геймпада
Должна отобразится оболочка RetroPie.
RetroPie снова предложит настроить джойстик или запустить инженерное меню. 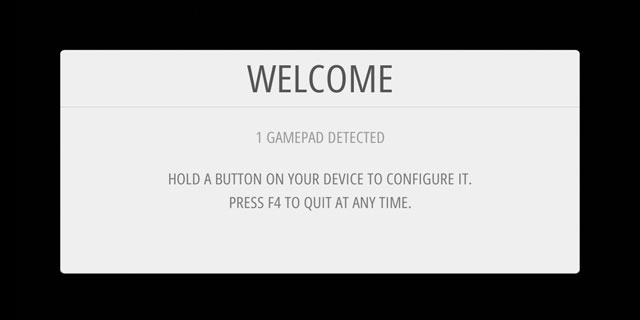
Зажмите любую кнопку на джойстике. Система предложит назначить кнопки управления для эмулятора.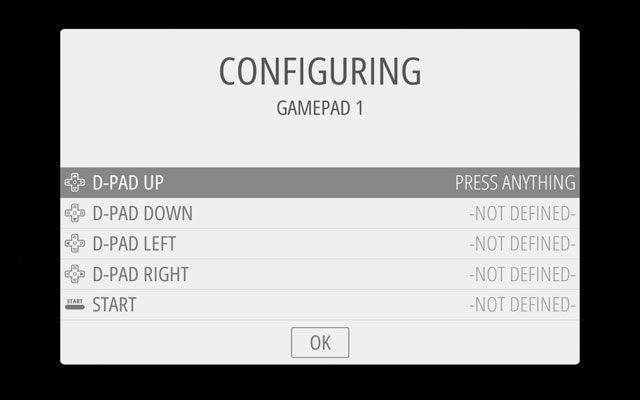
По окончании процесса маппинга наведите курсор на кнопку ОК внизу и нажмите клавишу A.
Откроется главное меню графической оболочки RetroPie.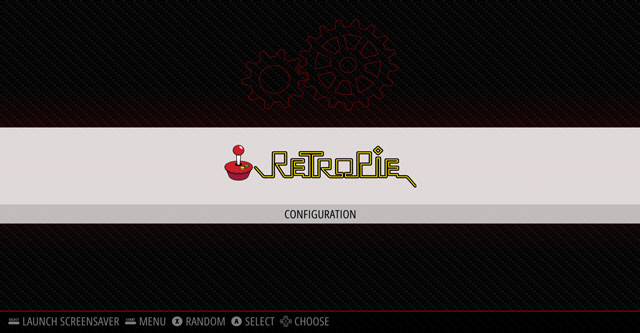
Загрузка игр в эмулятор
В мире эмуляции игры называются ROM’ами, потому что это цифровой слепок с оригинальной игры на картридже или другом носителе. Поскольку игры защищены авторскими правами, мы не вправе их выкладывать — поэтому ROM’ы необходимо скачивать самостоятельно.
Структурно же ROM’ы хранятся в директории: RetroPie roms $console , где $console — это краткое название игровой платформы: nes, snes, megadrive, psx и т.д. Каждую игру надо перенести в соответствующую ей директорию. Полный список поддерживаемых эмуляторов с названиями директорий читайте в официальной документации RetroPie.
Рассмотрим загрузку ROM’а в эмулятор на примере бесплатной демонстрационной игры Tanglewood. Т.к. игра предусмотрена для консоли Sega Mega Drive, то копировать ROM будем в директорию megadrive.
Загрузка игр через USB-накопитель
Если всё прошло правильно, то теперь вам стало доступно окно Mega Drive с игрой Tanglewood.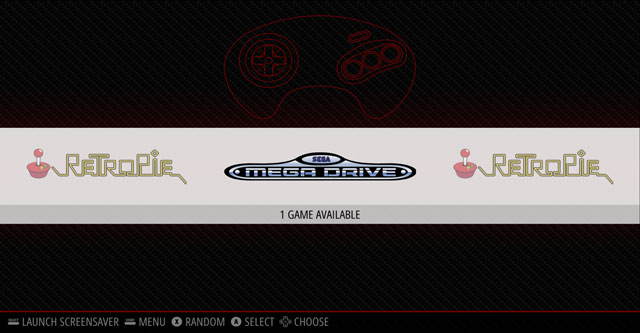
Загрузка игр по сети
Если всё прошло правильно, то теперь вам стало доступно окно Mega Drive с игрой Tanglewood.
Запуск игр
Для входа в игру выбирайте эмулируемую консоль и смело запускайте игру.
Для выхода из игры зажмите и удерживайте Start+Select, которые вы назначили во время маппинга.
Заключение
Мы рассмотрели пример работы RetroPie на демо-игре. Для полного погружения в эпоху 90-х ищите и качайте любимые игры самостоятельно — в интернете немало фанатских сайтов с коллекциями ROM’ов. Теперь вы точно готовы к бою! Пиу-пиу! ��️
Ресурсы
Для максимального погружения в эпоху 90-х, рекомендуем использовать готовые корпуса и аксессуары для Raspberry Pi в ретро стиле.
Controller Configuration
RetroPie supports many popular controllers out of the box. On first boot you will be prompted to configure a controller in EmulationStation. Once you finish configuring your controller, multiple configuration profiles will be automagically generated for most of the systems in RetroPie.
Some emulators will still require manual controller configuration which will be detailed on their respective system page here in the documentation.
You can also configure controls for individual systems and individual games. For more advanced controller configuration with libretro cores (any emulator that starts with lr ) see the RetroArch-Configuration page.
Note that some controllers (primarily wireless or bluetooth controllers) may require special drivers to be installed through the RetroPie Setup Script which are detailed on their individual controller page.
Controller Configuration
On first boot this menu in EmulationStation will configure your controls for both Emulationstation and RetroArch Emulators:

Hold down any button on your keyboard or gamepad and the name will appear at the bottom and then open up into a configuration menu:

Follow the onscreen instructions to configure your gamepad- if you run out of buttons just hold down a button to skip each unused button. When you get to OK press the button you have configured as «A».

If you wish to configure more than one controller, you can do so from the start menu of emulationstation. For more details on manual controller configurations see this page Here.
See the following diagrams for reference:
| SNES Controller |
|---|
 |
| XBox 360 Controller |
|---|
 |
| PS3 Controller |
|---|
 |
Hotkey
The Hotkey button enables you to press it in combination with another button to access functions such as saving, loading, and exiting in emulators. It is suggested to use the Select button as the hotkey. The following chart shows the default hotkey combinations. For example, if you chose Select as your Hotkey, that means you hold down Select while pressing the other button to execute the command.
Note Hotkey combinations are specific to the retroarch/libretro based emulators.