How to Make a Sphere in SolidWorks Tutorial for Beginners
Hai friends, welcome to solidworks tutorial for beginners and in this step by step tutorial, you are going to see how to make a sphere in solidworks. This SolidWorks tutorial helps you to design a sphere as well as Revolved Boss Base feature tool uses. Also explains how to make half sphere in solidworks for beginners.
I am assuming you guys are very clear about what is a sphere? If you are not click here
Let us start to make a sphere in SolidWorks cad software.
Table of Contents
How to Use SolidWorks Revolved Boss Tool to Make a Sphere?
For all Solidworks tutorial, you have to first create part file to make 2d sketch.
Step-1: Create New Part File
Open the SolidWorks CAD software and click on “New” and select “part” from the appearing dialogue box. And click “Ok”.
Select “front Plane” and apply “Normal To” and you can start 2D drawing on it.
Step-2: Draw Axis and Arc Sketch
For making Axis using centerline sketch tool, go to “Sketch command manager” and select “centerline” sketch tool from it.

And draw centerline through the origin as shown in the figure. This centerline sketch act as an axis for this Solidworks sphere tutorial.

For making half circle sketch, again go to the sketch command manager and select “center point arc sketch tool”.

Then, draw arc on the front plane by fixing the center as origin which is shown in the figure. You could set radius of arc by using “Smart Dimension Tool”.

Click on “exit the sketch”.
Step-3: Apply Revolved Boss Base Feature Tool
Go to “Features Command Manager” and select “Revolved Boss Base” feature tool from it.

It will ask you to select a plane or sketch to apply solidworks revolved boss base tool. You can select sketch as you created earlier from the Featuremanager design tree.
Here, select “sketch-2” and it will automatically select axis of revolution as “[email protected]” and apply direction-1 specifications to circle sketch. The angle of revolution is given as “360 degree” and it will make a complete solid sphere in solidworks.
The preview of sphere given below.

Step-4: Final
Click green tick button to apply “OK” in revolved boss base property manager.

How to Use Revolved Boss Tool to make Half Sphere
For making half sphere from the above sphere, go to featuresmanager design tree and select and right click on the “revolve” as shown in the figure.

Select “edit feature” and change angle as “180 degree” to convert the complete sphere to half sphere.

Click “Ok” to apply the specifications and make half sphere 3D solid model.

Watch SolidWorks Video Tutorial for Making Solid Sphere:-
This is step by step solidworks tutorial to make a sphere in solidworks. It also shows how to make half sphere if you have any doubts, ask through comment box.
Как сделать сферу в solidworks


SolidWorks. Урок. Бильярдный шар
 3 июля, 2014
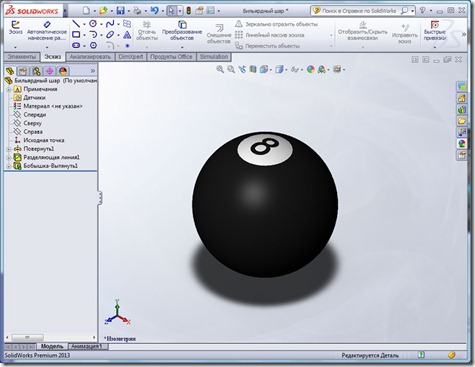
Недавно мне по e-mail задали вопрос, как создавать текст на цилиндрической поверхности. Я решил записать видеоурок, в котором мы создадим Бильярдный шар. Это видео и будет ответом на вопрос.
Сначала мы создадим шар, с помощью команды Повернутая бобышка, затем разделим полученную грань на три, применяя команду Линия разъема. После создадим текст, в виде цифры 8, спроецируем его на грани. Далее придадим граням нужные цвета.
How to make a basic sphere in SOLIDWORKS

Here is a perfect trick to draw a 3D sphere so fast in Solidworks.
Please click it worked below.. 😉
Step 1: Open
Open a part file in Solidworks and Open a sketch wherever you want (Top plane, Right Plane, Front plane or any other plane that is made by you)
-«Ön Düzlem» means Front Plane in Turkish. My operating system’s default language is Turkish, i can not change my SW fully in English-

Step 2: Draw
Draw a circle. (With two point circle) That will help you to attach your drawings on some points like attaching the center point of circle to the origin.)

Step 3: Use smart dimension
Use smart dimension to size your circle. That will make your drawing fully defined. (blue lines will turn to black.)
Select centerline (contionous line will work too but centerline is better) and draw a vertical line on the horizontal center of the circle.

Step 4: Select Trim
Select trim tool and click on «trim to closest». Than click on the left or right side of the circle (directly to the line) to get a half circle. Click on the green button on the top right to confirm trimming.

Step 5: Sketch confirmation
Now you have a half circle. Click on the sketch confirmation button on the top right.

Step 6: Select Features
Click on the Features on the top. And then click «Revolved Boss/Base»

Step 7: Select 360 degrees
After clicking «Revolved Boss/Base click on the vertical line on the sketch. (it will work on this skecth no matter where you clicked. But on your future drawings that will help you to click on axis line. This feature will select the revolve axis automatically that you clicked first.)
You can change the filling angle as you can see on the image. We select 360 degrees to get a full sphere.
Then click to confirmation botton on the top right.

Step 8: Sketch & edit your sphere
Here you have a basic sphere. you can find and right click on the sketch then edit it to change the radius.
(give names to your sketches. that will help you in the future. you can do it by selecting the sketch on feature tree and then pressing f2 button on your keyboard.)
Hope this tutorial worked for you. If yes click on «it worked below» 🙂 thanks.
Как сделать купол в Solidworks?
Нажмите «Купол» на панели инструментов «Элементы» или нажмите «Вставка» > «Элементы» > «Купол». Выберите одну или несколько плоских или неплоских граней. Установите значение расстояния, на которое расширяется купол. Нажмите, чтобы создать вогнутый купол (по умолчанию выпуклый).
Как сделать купол в SolidWorks 2020?
Чтобы создать купол: Нажмите «Купол» на панели инструментов «Элементы» или нажмите «Вставка» > «Элементы» > «Купол». Вы можете создать один или несколько элементов купола одновременно в одной и той же модели.
Как вставить разрыв строки в SolidWorks?
Чтобы создать линию разделения проекции:
- Щелкните Разделить линию. (панель инструментов «Кривые») или выберите Вставка > Кривая > Линия разделения.
- В PropertyManager в разделе Тип разделения выберите Проекция.
- В разделе «Выборы» нажмите «Эскиз для эскиза в проект». . Вы можете выбрать несколько контуров из одного и того же эскиза для разделения. …
- Щелкните . До. После.
Где купол в Solidworks?
Нажмите «Купол» на панели инструментов «Элементы» или нажмите «Вставка» > «Элементы» > «Купол». Вы можете создать один или несколько элементов купола одновременно в одной и той же модели.
Как сделать полое твердое тело SolidWorks?
Чтобы преобразовать граничную поверхность в твердое тело, щелкните «Вставка» > «Поверхность» > «Граничная поверхность» и в разделе «Параметры и предварительный просмотр» щелкните «Создать твердое тело». Чтобы преобразовать элемент отсеченной поверхности в твердое тело, нажмите «Вставка» > «Поверхность» > «Обрезать поверхность» и в разделе «Параметры разделения поверхности» нажмите «Создать твердое тело».
Как сделать купол в Solidworks 2019?
Чтобы создать купол: Нажмите «Купол» на панели инструментов «Элементы» или нажмите «Вставка» > «Элементы» > «Купол». Вы можете создать один или несколько элементов купола одновременно в одной и той же модели.