Замена салонного фильтра
Всем добрый день! Давно ничего не выкладывал, и тут пришел фильтр. Не думаю что кому-то будет в новинку но вдруг кому пригодится. Для начала нужно снять бардачок отщелкнуть справа пальцами цилиндр (который придерживает опускание бардачка)а затем просто резким движением за один из углов дергаем на себя затем следующий и бардачок выходит.
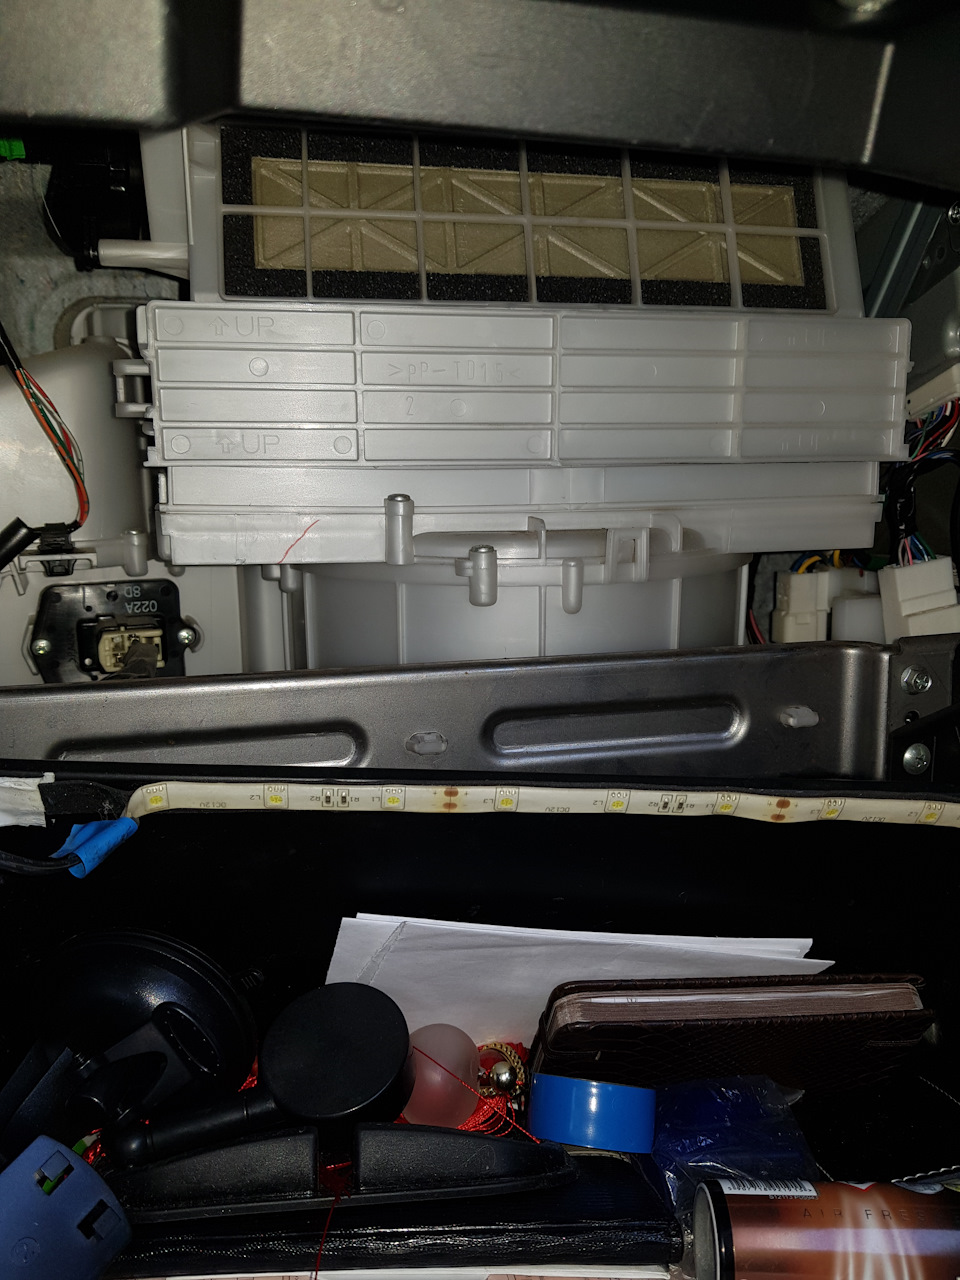 Вот что мы видим когда убираем перчаточный ящик.
 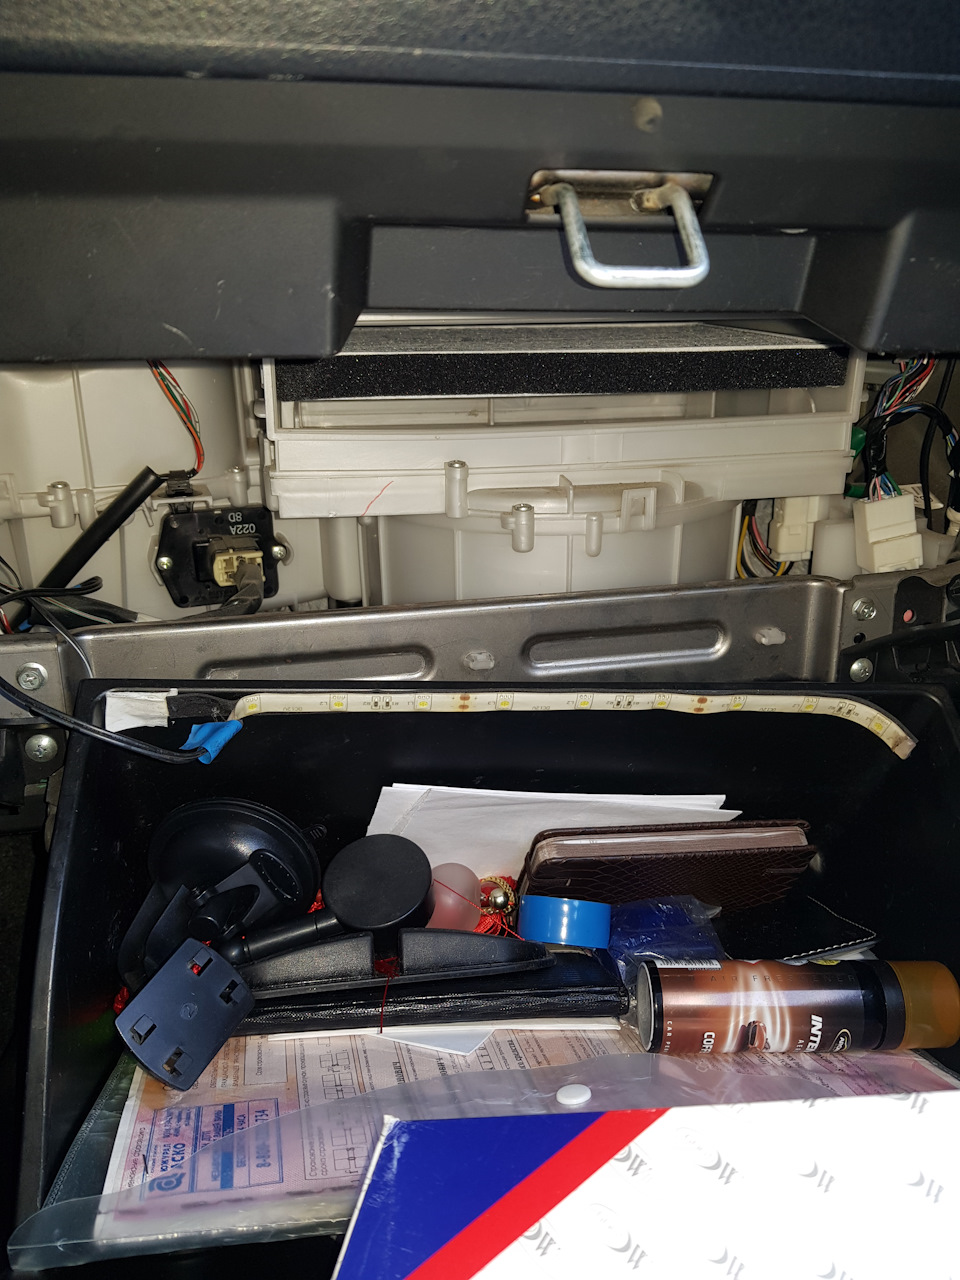 Новый новый фильтр на месте
Заказывал через EXIST ( неоригинал, угольный). До этого также заказывал неоригинал, но у старого на боковом бортике было обозначено где верх. И расположение поперечин как видно на фото совсем другое,
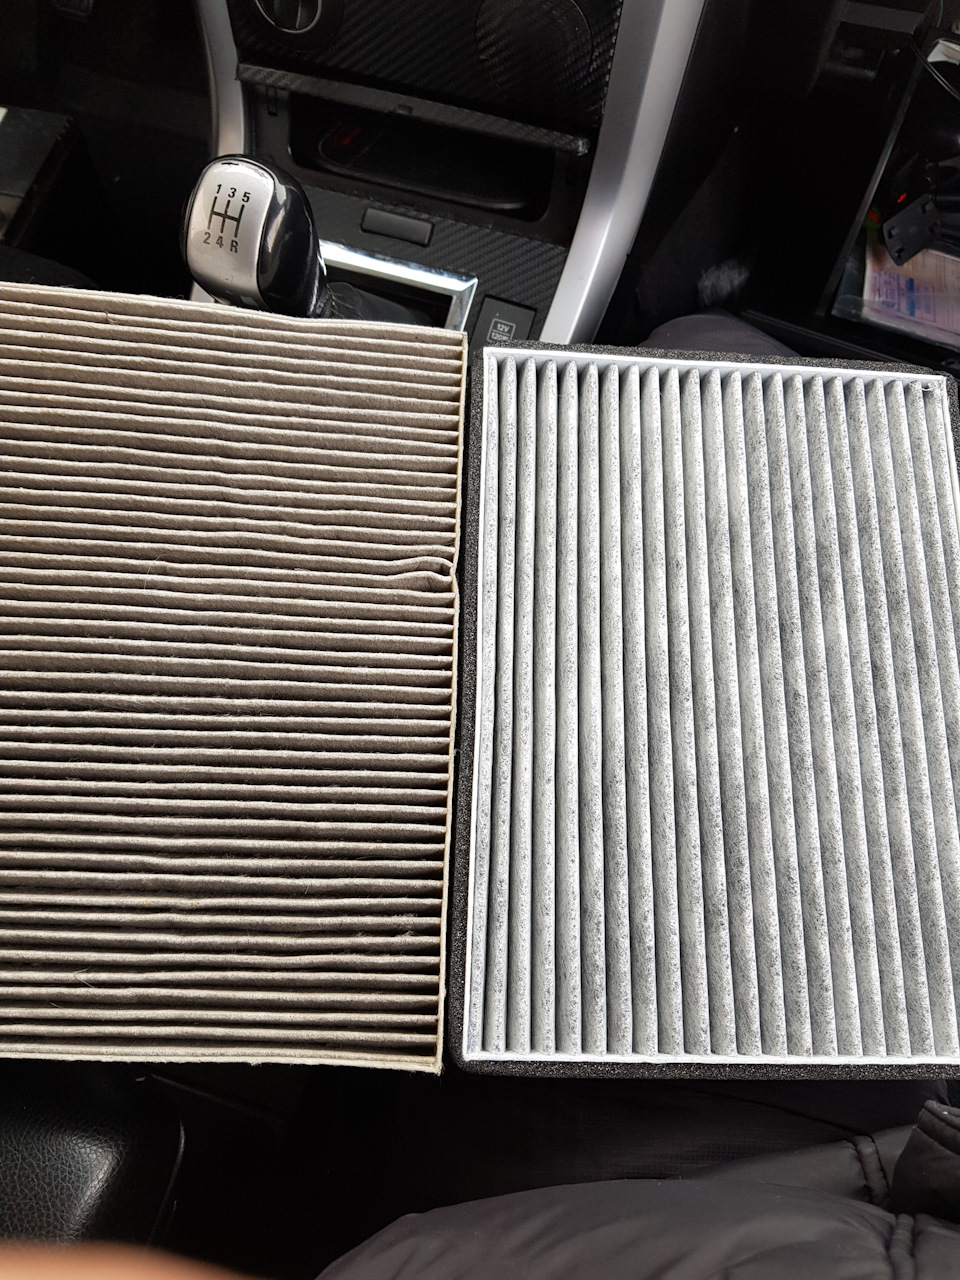 Сравнение естественно слева старый, справа новый!
но думаю это особой роли не играет. А плюс нового фильтра, то что его края обшиты тонким поролоном благодаря которому фильтр плотно встает на место.
Как снять перчаточный ящик на сузуки витара

Модель: Suzuki Vitara LY — Годы 2015-2022
Часть: Салонный фильтр
эксплуатация: Как заменить салонный фильтр Сузуки Витара?
Замена салонного фильтра в Suzuki Vitara — чрезвычайно простая и быстрая операция, давайте посмотрим, как это сделать в этом уроке. Первым делом располагаемся на пассажирском сиденье, затем открываем бардачок, отсоединяем амортизатор с правой стороны и отцепляем ящик от приборной панели, вдавив обе стенки внутрь. Как только это будет сделано, находим длинную прямоугольную дверь, открываем ее, разблокировав левый зажим, и извлекаем старый фильтр. Наконец, очистите внутреннюю часть корпуса от остатков, вставьте запчасть в нужном направлении и соберите все обратно.
другие руководства, которые могут вас заинтересовать
- Suzuki Vitara — прочее техническое обслуживание и ремонт своими руками
- дверь — Техническое обслуживание и ремонт других транспортных средств
Как сохранить свечи
Вот видеоурок, объясняющий, как обслуживать (или заменять) свечи зажигания на Toyota Yaris. Вот что вам нужно: карманный ключ с трещоткой на 10 мм, медная смазочная трубка и карманный свечной ключ на 16 мм. Сначала отсоедините клипсы, крепящие воздушный короб. Теперь у вас есть доступ к свечам. Карманом на 10 мм ослабьте болт крепления катушки зажигания и извлеките саму катушку; гнездом свечного ключа на 16 мм открутите и выньте свечу зажигания. Нанесите немного медной смазки на его головку, затем вкрутите его обратно в корпус и снова вставьте катушку зажигания. Снова отпустите болт катушки и снова прикрепите зажимы воздушной камеры.
Как снять бардачок ?
Путем применения не грубой силы высвобождаешь поочереди ограничительные упоры открывания бардачка и открываешь его дальше на себя. После этого он легко вынется.
На дорестайле это делается иначе.
cheeeter
Профи
Ответ: Как снять бардачок ?
я недавно снял чтобы вытрихнуть мусор. вроде легко снялось патом легко поставилось)) но расстроился сильно когда он выпал у меня. и я понял что либо сильно вытащил либо вставил не так одно ушко сломалось пластиковое )) патом акуратно вставил вроде не выпадает)
Как снять перчаточный ящик на сузуки витара
Думаю, не всем интересно регистрироваться на том сайте, поэтому вот текст статьи:
Mildew smell comming from Air Conditioning
Tools Needed :
— Aerosol can of "Odor Out" or other air conditioning odor cleaner.
You can buy this from any automotive store.
* Disclaimer * — As always we are not responsable for any damage caused by any How-To/FAQ or any other content contained on this site for that matter.
Contributed by: Ward C
A lot of people across the board on all types of vehicles eperience what we call the mildew smell from their AC system. A little research has pretty much placed the problem to continued use of the recirculate mode when running the A/C. It is usually better to try and only use recirculate when absolutely necessary.
Now that we . The directions ask you to spray the product into the intake side of the A/C plenum chamber with the system in the recirculate mode with the fan on high, then switch to outside mode and spray the remaining portion of the can in the intake vent at the base of the windshield (out side).
*Note please follow directions on your product if they differ from this.
Step #1 :
— Lets start by buying a can of this stuff or similar. hah! 
Step #2 :
— Now you need to remove the glove box.
— You can either unscrew it (as shown) or pop the damper off. If you pop it off too often it may not clasp one of these times, so be careful. 
Step #3 :
— Locate the stoppers on both sides of the glove box.
— Now sqeeze inwards and pull glove box down a bit. Then pull out. 
Step #4 :
— You can see here where the filter cover and filter have been removed for easy access to spray our cleaner up into it.
— You should also be able to see the flaps open and close when you change between outside air and recirculate.
— So go ahead and follow the instructions on your can and spray it here while running the recirculate mode.
— Remember you may also spray it in the outside vents also.
— Make sure to follow the instructions on your can as it may be different. 
Reference photos below.
— Picture of the cover removed. 
— Picture of the filter removed. 
— Picture of filter in place 
*Note The follow text is provided by Ward C. as part of his how-to.
All went well with the injection process. I did find you need to keep the can in a upright position for the product to spray correctly. I might mention this particular product comes out in a sort of spray/foam manor rather that just a spray. The only down side at the moment is the smell. It’s not exactly a bad smell (to me), but the intensity level is like, well, off the chart. When I had everything buttoned up I took the car out for a while in hopes that it would "air out", which it did a little, but not much. I now have the car sitting in the garage with a fan blowing on it in hopes it will be better by morning. This could be a case where the cure is worse than the problem. I can tell you one thing; there is NO mildew musty order now.
Anyway, getting to the filter is pretty easy. At 3,500 miles the filter is already showings signs of dirt even at this early stage and being run in the recirculate mode. Shows it must be pretty effective. The photos show the basic process and the location of the cabin filter.
The following day: Well, the smell is still there but not nearly as intense.
And the last step is to breath in some of the clean clear air. Ahhhh.
You will want to probably replace this every few months. As you will probably see the filter gets dirty and dusty very quick.